Updated October 14, 2026. Written for PdfCraft 0.7.1 (what changed since).
Fill in a form with fields
- Open the PDF: go to easyruncraft.com/pdfcraft/editor and drag the file onto the window, or click Open.
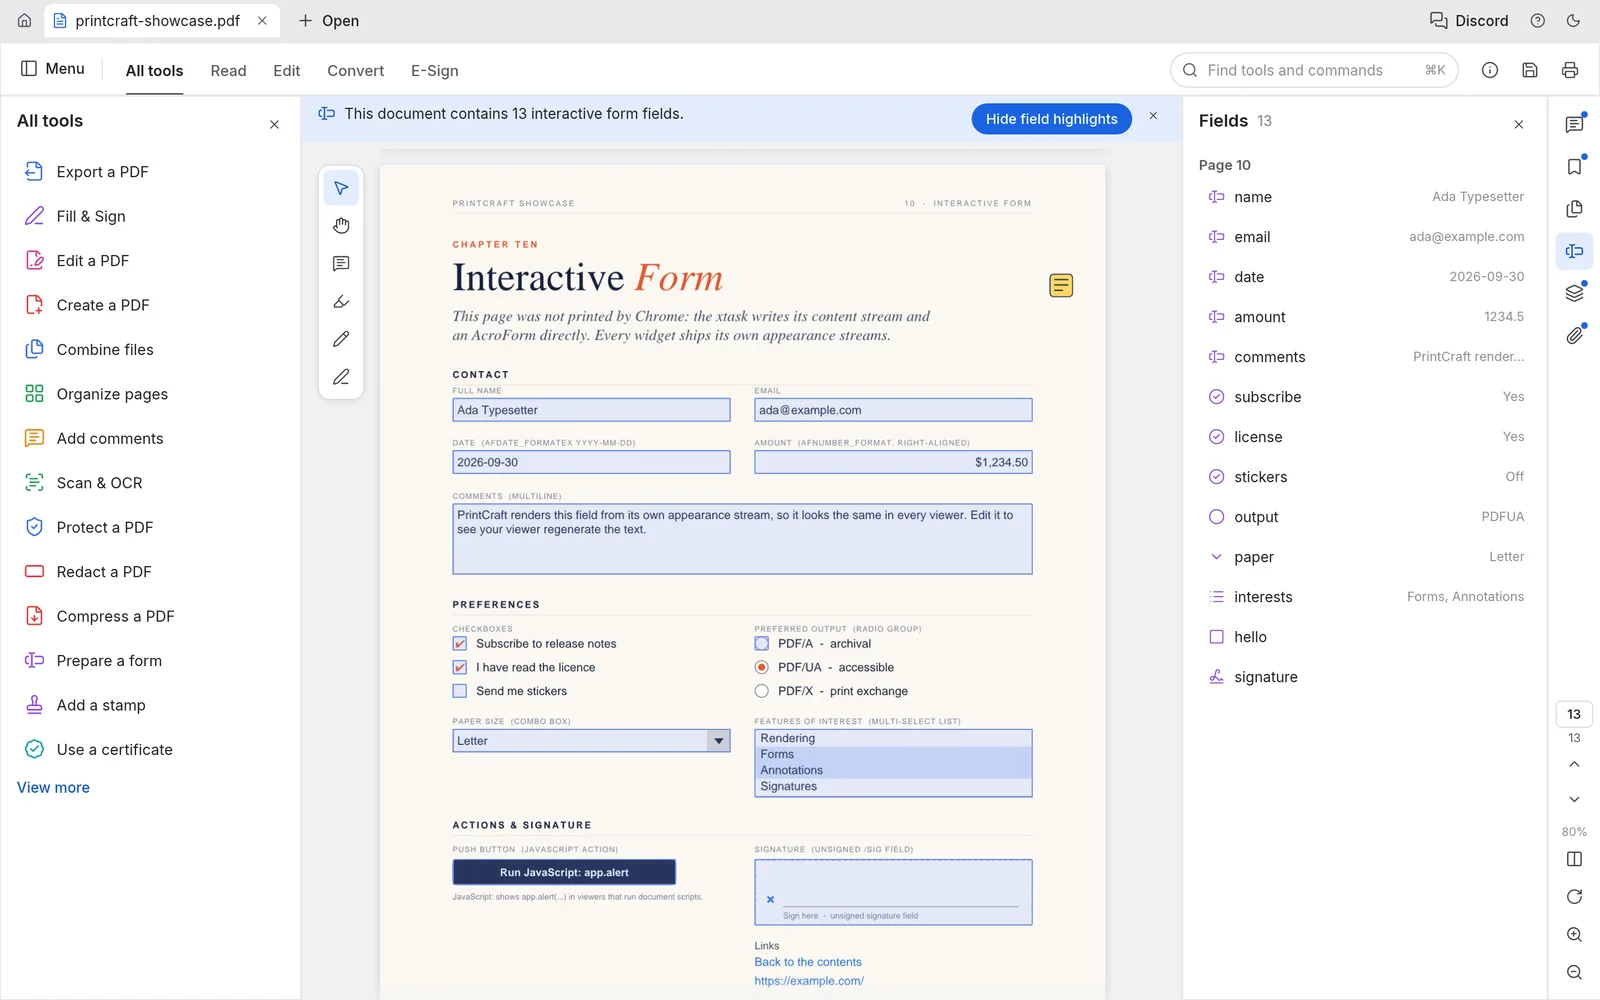
- Find the fields. When the document has interactive fields, a banner says how many. Click Highlight fields to see them all; the Fields panel on the right lists each one with its current value.
- Fill them in. Click a text field and type, tick checkboxes and radio buttons, pick from lists. Tab moves to the next field.
- Start over with Menu › Edit › Clear form, which empties every field. Ctrl/⌘+Z undoes one step at a time.
Fill a flat PDF with Fill & Sign
Scanned forms and PDFs exported from Word usually have no fields, so there is nothing to click into. Open Fill & Sign from the All tools list (or press Ctrl/⌘+K and type "fill") and put what you need on top of the page: text such as names, addresses and amounts, a checkmark, cross, dot or line in a box, or today's date in the format set in Preferences › Date format.
Each of these is saved as an annotation, a layer above the page content. That is why you can move, delete or undo it later, and also why the recipient's PDF editor can do the same. To fix your entries into the page itself, turn on Flatten Fill & Sign when saving in Preferences before you save. Typed form fields can be locked the same way with the Flatten form fields command.
How to sign a PDF online
- In Fill & Sign, choose Sign (or Initials). The first time, PdfCraft asks you to create one.
- Pick one of four tabs. Type sets your name in a script font. Draw takes the mouse or trackpad. Image takes a PNG or JPEG of your signature up to 4 MiB; transparency is kept and a white background is removed. Scan takes a photo of a signature on paper and cuts out the paper (details below).
- Click Apply, then click on the page to place the signature. Drag it to move it; drag a corner to resize it, which keeps an image signature's proportions.
- Save with Menu › File › Save (Ctrl/⌘+S). The signed PDF downloads to your computer.
A pen signature on paper looks more natural than a mouse drawing, and the Scan tab is the quickest way to get one. Sign a sheet of white paper, photograph it in bright, even light (flash on), click Choose photo… and pick the picture. PdfCraft finds the ink, removes the paper around it and lets you rotate the result if the photo was taken sideways. The photo has the same 4 MiB limit as an image.
Your signature and initials are remembered in this browser's storage on this device, with PdfCraft's other settings, and are not sent to easyruncraft.com. The saved signature appears in the Fill & Sign panel with buttons to change or remove it. Clearing the site's data in your browser removes it too.
Fill & Sign puts a visible signature on the page, the same as signing a printout and scanning it back. Some recipients ask for a certificate-based digital signature from a digital ID (PKCS #12) instead. The browser version can't sign with a certificate; the desktop app can, including identities in the macOS Keychain or the Windows certificate store.
Before you send it
- Check every page in Read mode (Ctrl+H on Windows and Linux, ⌃⌘H on macOS).
- Remove what the recipient shouldn't see with redaction, which deletes the text underneath instead of covering it.
- Lock it with a password using Menu › File › Protect using password….
- Need a paper copy? Menu › File › Print… (Ctrl/⌘+P) sends the pages to your browser's print dialog, where you pick the printer, copies and two-sided printing.
- Sending it with other documents? Merge the PDFs into one file first.
- Long contract? Ask the Chat with PDF panel for the deadlines and amounts before you sign.